Hi all,
I'm a D1 student currently struggling with class I resin composite restoration. We need to recreate all the cusps and anatomy of the occlusal surface using packable resin composite on typodont.
I know I have to swipe from composite to tooth structure to create smooth surface but I can't identify where is the margin of the tooth structure and how to angle my flat instrument to get the contour.
When I add the composite, it blocks my view of the cavity margin such that I don't know how much to swipe and how to angle my swiping (see in the picture attached). Then I will end up with excess and deficiency on the occlusal plane. My margin is always smooth because I swipe a lot to make sure it is smooth. But my occlusal plane always have either excess or deficient composite. I suspect it's the angling but I don't know how to correct it.
Please help
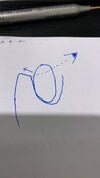